
"Frozen Flower Pallets"
Nature unfolds at the first rays of dawn. The days grow longer, temperatures become milder, insects appear and trees start to bud. Spring is on its way.
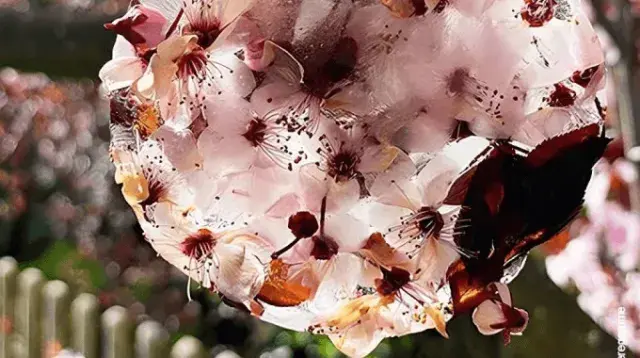
Our frozen discs melt drop by drop, gradually releasing our seasonal flowers. Like a metaphor for winter giving way to spring, we are utterly captivated.
This is work is ephemeral in nature. The present moment is the most important. Know when to stop, observe and appreciate.
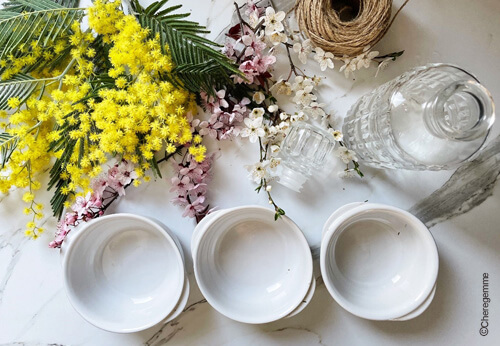
The material needed for these frozen discs
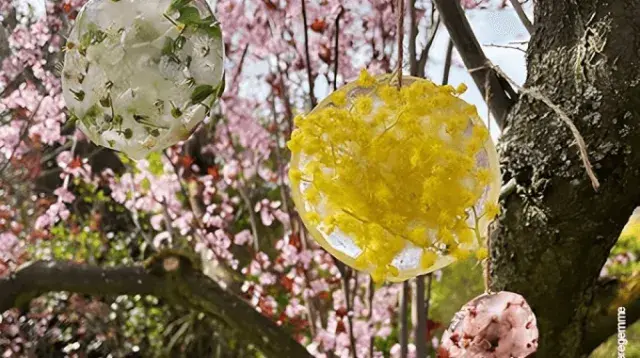
With nature as the core of our activity, we start with what the season has to offer. Some flowers gathered with care. As always. From our garden or that of a friend. And if you have no garden, some herbs or leaves from an indoor plant will do perfectly.
 Which flowers?
- In March: mimosa, prunus or forsythia flowers.
- In April: geranium, laurustinus, ranonculus (buttercup) flowers.
- In May: poppies, cornflowers, lilacs.
You will also need several ramekins, some string (preferably organic), a bit of water and some patience for the freezing process.
The idea behind this activity is not to buy anything.
If you don’t have small ramekins, work with whatever you find in your cupboards: the bottom of mixing bowls, small tart tins, muffin or cookie moulds. And if you don’t have any string? Why not use a bit of yarn? Even a shoelace will serve just for the activity period.
Creating frozen discs
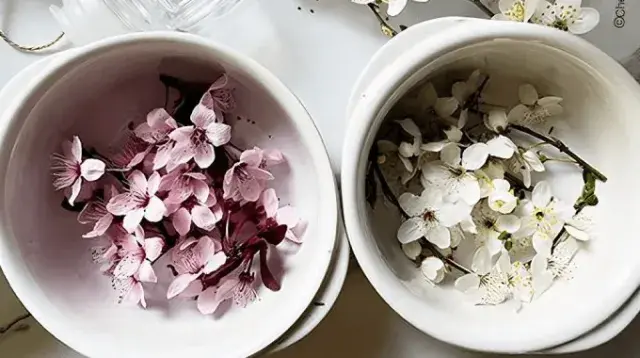
Add just enough of your seasonal flowers to cover the bottom of the recipients.
One recipient for each type of flower or for each flower combination. As the fancy takes you.
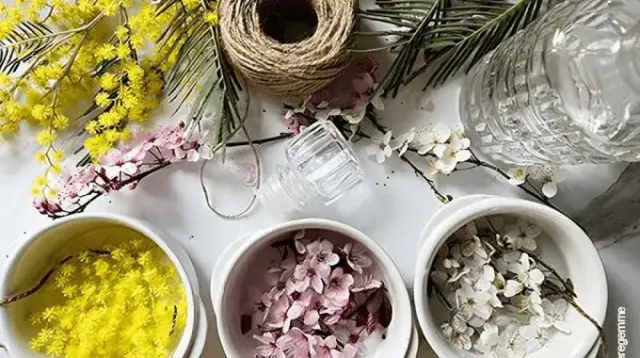
Add a bit of water - between 1 to 2 cm - as well as the end of a piece of string.
The string should be immersed up to the centre of the recipient. Make sure the string is long enough so that you can easily hang up your frozen discs.

Now into the freezer for several hours or overnight.
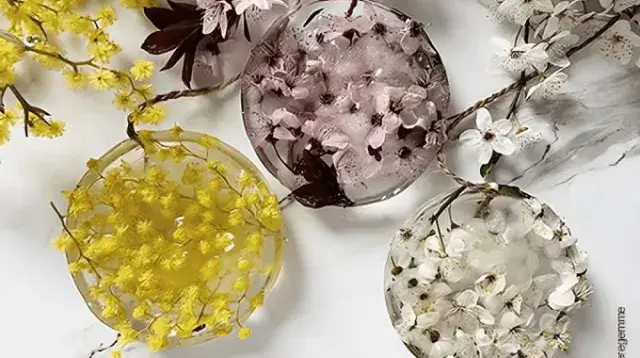
Once your discs are frozen hard, it’s time to take them out of the mould.
The trick is to hold them under a stream of hot water for just a few seconds.
Enjoy the present
Now all you have to do is find where to hang them for observation.
From a tree branch in the garden, on a plant on your balcony or in your living room, or even over a sink in your home.
Winter gradually gives way to springtime
As the disc drips, it slowly frees your seasonal flowers.
DIY article written and created by ©Cheregemme
Photos by ©Cheregemme